Insulation removal can be a time-consuming and difficult project. You will need a dumpster and specialized equipment to complete the task effectively.
Start by clearing out your attic and making sure that no furniture is stacked in the area. It is also important to turn off any power and disconnect live wires so you do not damage electrical systems. For more information, click the Website to proceed.
Insulation plays a major role in your home’s energy efficiency. If your attic or wall cavities have old and damaged insulation, it can lead to air leakage which drives up your utility bills and puts your home at a greater risk for damage from mold, pests, and moisture. Moldy insulation can also be a structural risk as it will deteriorate and rot over time. The best way to avoid these issues is by removing the old insulation and replacing it.
When insulating your home, it is important to make sure that you have the proper equipment to handle the job. This includes a high-powered vacuum, an insulation removal tool and gloves to keep your hands from becoming irritated. If you are removing blown in insulation, it’s also recommended to have a large trash area lined with tarps and a dumpster.
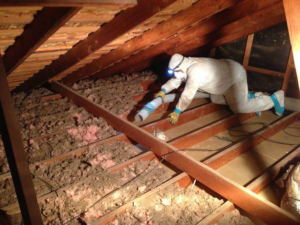
Before beginning the process of removing insulation, it is important to prepare the work area by clearing out all belongings from the attic space and covering any items that cannot be moved. This will help prevent the accidental damage of items that could be stored in the attic during the insulation removal process. It is also a good idea to wear protective gear during this time, including gloves, goggles, and a dust mask. This will protect you from the fiberglass and other irritants that can be found in your old insulation.
Another important step in preparing for insulation removal is to ensure that all electrical systems are disconnected from the power source. This will minimize the risk of damage to wires during the insulation removal process and prevent an electrical shock. It is a good idea to turn off any lights in the attic, open windows, and use portable fans for better ventilation during the insulation removal process.
Finally, it’s a good idea to spread plastic over the contents of the attic to protect them from the dust that is created during the process. The loose cellulose in most insulation is made from recycled newspaper, and the dust it creates can make its way down into your living space and into your central air system.
Equipment
Insulation removal is a demanding DIY project that requires a number of safety precautions to be taken. It involves working in cramped spaces and at heights, and it often deals with dangerous materials like asbestos and fiberglass that can cause respiratory problems if inhaled. Without proper equipment, homeowners risk falling, injury, and damage to their homes. In addition, they may be exposed to dangerous chemicals that can affect their health and well-being.
A specialized insulation removal vacuum is a key piece of equipment for this type of job. This tool creates suction to extract insulation and disposes of it into a bag for easy cleanup. It’s important to choose a vacuum that’s designed for the type of insulation you need to remove and follow the manufacturer’s instructions on setting it up. It’s also a good idea to wear protective gear, such as dust masks, gloves, and goggles, when operating the machine.
The next necessary item is a sturdy ladder to help you access hard-to-reach areas. You’ll also need a pair of work boots with slip-resistant soles and an extension cord to reach outlets and lights in the attic. Finally, you’ll need a rake and dustpan to gather up any remaining insulation debris. Then, you can dispose of it in a dumpster.
Depending on the type of insulation, the removal process can be a messy one. For example, if you have blown-in cellulose or fiberglass insulation, the material is likely to be scattered all over your attic and walls. It’s also important to cover any furniture in your attic that’s not being moved during the removal process.
If you plan to reuse the insulated material or sell it, you should check with your local waste management agency for information about how to dispose of it safely. Some communities require that old insulation be burned in a designated area, while others have banned its disposal. The best way to avoid these issues is to hire a professional insulation removal company that can handle the entire process for you. This will ensure that the material is properly disposed of and will not pose a health threat to your family or pets.
Safety
Insulation removal can be messy, dusty and hazardous. It’s important to follow safety protocols throughout the process in order to prevent injury and avoid exposure to harmful materials. It’s also important to properly dispose of the old insulation to avoid environmental hazards.
If the insulation is not removed properly, it can trap moisture that can lead to mold growth, rot, and structural damage. This can cause costly repairs and significantly reduce the value of the home if it’s eventually sold. Proper insulation removal helps to eliminate these conditions, improves indoor air quality and prevents the spread of harmful allergens.
Safety measures during insulation removal should include the use of appropriate personal protective equipment. This includes a respirator or dust mask, long-sleeved shirt and pants, gloves, and goggles. These will protect against dust, debris, and potentially dangerous allergens like mold spores and animal dander that can be stirred up during the removal process.
In addition, it is important to take care not to disturb the existing ductwork and electrical wiring in the attic while removing insulation. This can create a fire hazard, especially if live wires are exposed. It’s best to have the power shut off or disconnected in the attic before beginning the removal process, and it’s a good idea to have a professional do this for you if possible.
Finally, it’s important to wear comfortable shoes and a face mask when handling insulation. Fiberglass degrades to a dust-like substance that can stick to the skin and inhaled, causing irritation and other health problems. It’s also helpful to keep a trash bag handy to catch insulation as you work.
After completing the insulation removal process, it’s a good idea to clean the attic space to ensure that it is ready for new insulation or any other necessary repairs. This will help to avoid dust and debris from contaminating the rest of the house. It’s also a good time to check for any signs of leaks, pest infestations, or other issues that need to be addressed. By prioritizing safety and efficiency, homeowners can prepare their attic spaces for fresh insulation or repairs with ease.
Time
The time it takes to complete insulation removal varies depending on the size of the house and the type of insulation. It’s important to consider hiring a professional to ensure the process is done correctly. This ensures your safety and prevents fiberglass fibers from getting everywhere throughout the home. Additionally, a professional will use specialized equipment to remove old insulation safely and efficiently.
If you decide to handle your insulation removal yourself, you’ll need the following supplies:
Insulation should be inspected regularly for signs of damage. Whether it’s from rodent droppings, mold growth, or simply wear and tear, damaged insulation needs to be replaced immediately to avoid health hazards, poor energy efficiency, and expensive utility bills.
It’s also important to inspect insulation before starting a remodeling project that may involve altering walls or ceilings where the insulation is located. An insulation pro can help you determine the best type of insulation for your home and install it properly to get maximum results from your remodeling project.
Some types of insulation, such as wet cellulose and waterlogged fiberglass, can cause significant structural damage if left in place. This damage can lead to sagging roofs, water leaks, and musty odors that can affect the entire house. Replacing damaged insulation is one of the fastest ways to improve air quality and eliminate lingering odors.
Rodents and pests love to make their homes inside loose-fill insulation and fiberglass batts. Their urine and fecal droppings can permeate the material and spread disease throughout your home. Additionally, if the insulation becomes damp or wet, it can be susceptible to mold growth that can produce musty odors and affect everyone’s health.
When replacing your insulation, it’s essential to choose the right type and thickness to meet your energy needs and provide the best value for your money. An insulation professional can recommend the most appropriate type of insulation for your home and help you understand the benefits of various insulation products. They can also help you choose the most effective installation method to maximize your home’s energy efficiency. They can also help you with any other questions or concerns you may have about your home’s insulation.